Tutorials & Tips

Before & After: Brightening Up a Farmhouse Style China Hutch

Hello, friends! We're so excited to have a new Annie Sloan Before + After to share with you! 

cp_cindychinahutch.jpg

One of our clients has been updating her home, and she was ready to give her red china cabinet a fresh new look to tie in with the rest of the updates and brighten up the space. We updated it with a light and airy color and finish, and we're so pleased with how it turned out! 

Here's how we did it:

First, we painted the whole piece, including the shelves, with a fairly thick coat of Old White chalk paint.

After 1 coat of Old White

After 1 coat of Old White

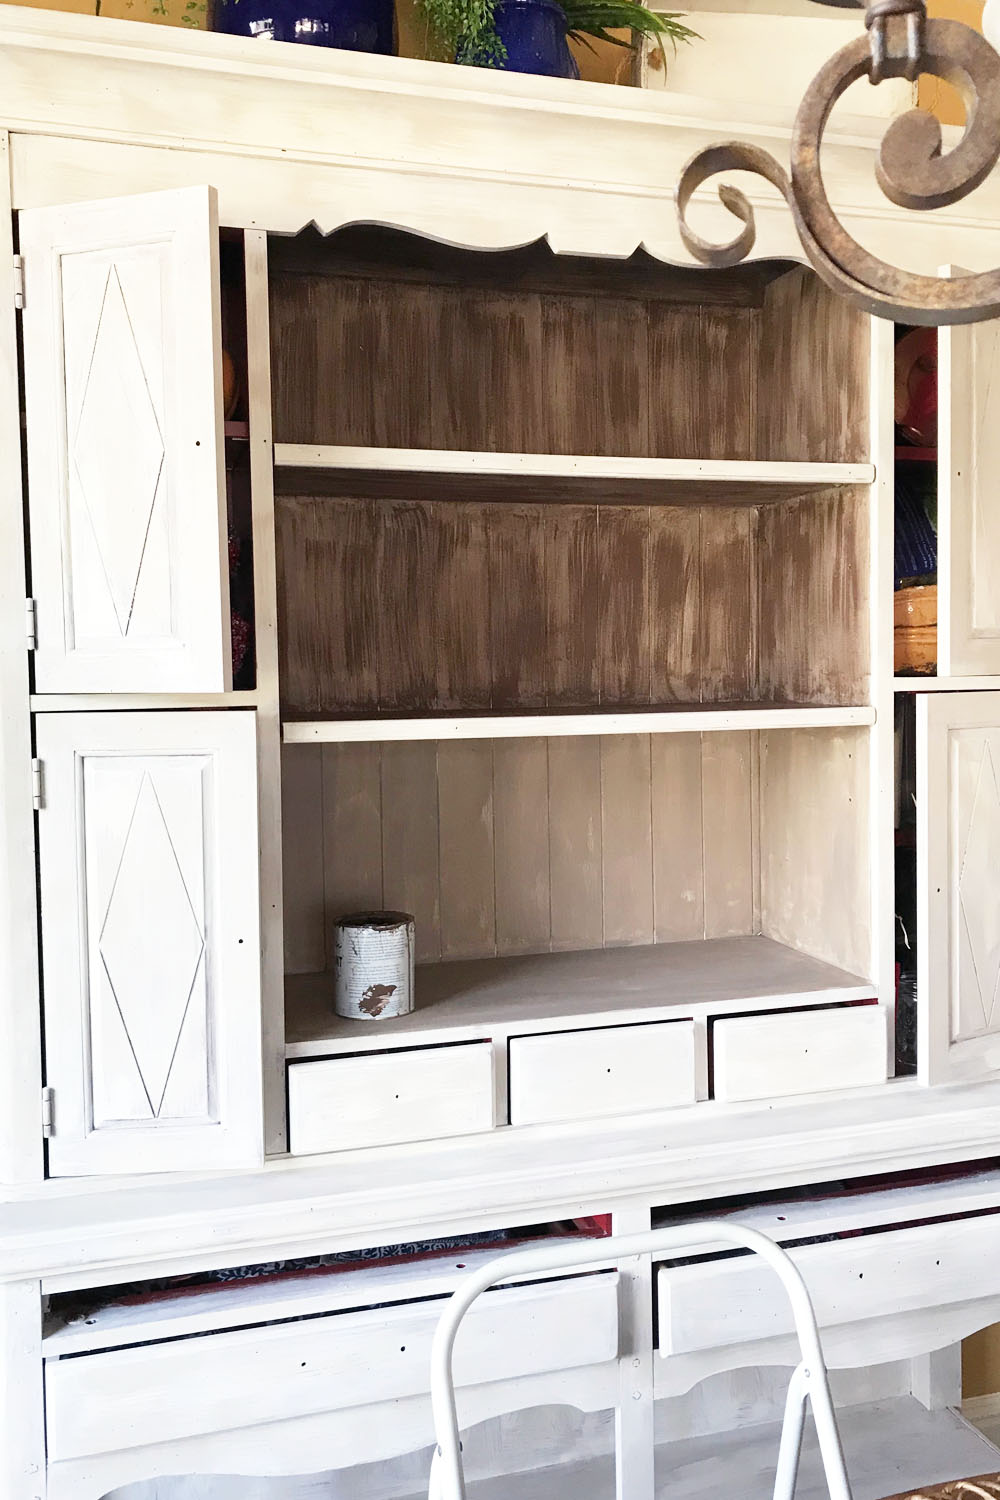
The "brush-y" look that the piece had after the first coat was very visually interesting and close to what we wanted the final product to look like, but we wanted to add a little dimension and depth, as well as cover the original red color. So, we mixed Old White with a hint of Coco to add a little warmth and dry-brushed the entire piece. 

Then, we painted the inside of the shelf area with a coat of Coco chalk paint. When that dried, we dry brushed the entire shelf area with Honfleur. 

During the process of dry brushing Honfleur over the solid coat of Coco on the inner shelves.

During the process of dry brushing Honfleur over the solid coat of Coco on the inner shelves.

A note about dry-brushing: go with the "grain". For example, on the shelves, we dry-brushed horizontally (left to right), but on the back wall of the shelves, we dry-brushed vertically. We try to go in the direction of our paint strokes or of "wood" so that it visually makes sense. This totally depends on the details of the piece and the look you're trying to achieve, but we feel like this is a good rule of thumb to start with. 

Also, make sure to not get too much paint on your brush when dry-brushing. Having a paper plate nearby to dab some of the paint off of your brush is helpful. 

cp_cindychinahutch_after2.jpg

We finished the piece with Clear Wax to seal it and keep the matte finish and added a little bit of the Copper Gilding Wax to the existing hardware. Then, we styled it with a mix of our client's accessories (she had so many pretty pieces!) and a few pieces from the store. 

cp_cindychinahutch_after.jpg

All of the Chalk Paint and Wax we used are Annie Sloan products. 

We hope this was a helpful before & after! Let us know if you'd like to see posts like this in the future! 

Our Go-To Paint Colors

Sometimes, choosing a paint color can be an overwhelming task. Paint color options are limitless these days, and while that’s amazing, selecting the perfect colors can be very difficult. That's why we've rounded up some of our favorite paint colors to help you choose the perfect paint color for your next project!

Our favorite paint colors (from left to right): Grant Beige (BM), Revere Pewter (BM), Wickham Gray (BM), Sea Salt (SW), Icy Morn (BM), Natural Cream (BM), Manchester Tan (BM), Moderne White (SW), Shoreline (BM), Simply White (BM), Anonymous (PPG/Por…

Our favorite paint colors (from left to right): Grant Beige (BM), Revere Pewter (BM), Wickham Gray (BM), Sea Salt (SW), Icy Morn (BM), Natural Cream (BM), Manchester Tan (BM), Moderne White (SW), Shoreline (BM), Simply White (BM), Anonymous (PPG/Porter), Salty Breeze (PPG/Porter), Ashwood (BM), Swiss Coffee (BM), White Dove (BM), Hale Navy (BM), Millstone Gray (BM), Urbane Bronze (SW), Rockport Gray (BM), Kendall Charcoal (BM). 

We tend to lean toward warm grays and whites when selecting a neutral for your walls. They're the perfect neutrals and can be paired with both cool and warm tones.

Swiss Coffee (Benjamin Moore) used on the walls in A Spanish Living Room via Style by Emily Henderson. Photo by Max Kim Bee. Designed by Emily Henderson, with photo styling for Country Living by Elizabeth Beeler. 

Swiss Coffee (Benjamin Moore) used on the walls in A Spanish Living Room via Style by Emily Henderson. Photo by Max Kim Bee. Designed by Emily Henderson, with photo styling for Country Living by Elizabeth Beeler. 

Manchester Tan (Benjamin Moore) used in our client's living space.

Manchester Tan (Benjamin Moore) used in our client's living space.

We're also loving neutrals with green undertones, such as SW Sea Salt and PPG Salty Breeze. They feel like a breath of fresh air and evoke a sense of being near the water. 

Sea Salt (Sherwin Williams) used in a beautiful guest bathroom in The Midway House designed by Studio McGee. 

Sea Salt (Sherwin Williams) used in a beautiful guest bathroom in The Midway House designed by Studio McGee

Built in bookcase and desk painted with Hale Navy (BM). Photo via Benjamin Moore. 

Built in bookcase and desk painted with Hale Navy (BM). Photo via Benjamin Moore

We also love dark, moody paint colors such as Hale Navy (Benjamin Moore). It's a rich, dark navy that works with both traditional and modern styles. In the above photo, Hale Navy is used on both the walls and the woodwork and pairs beautifully with the brass hardware. It feels very classic and sophisticated, but creates a beautiful backdrop for a few modern pieces, such as the coral molded desk chair and the sleek brass coffee table. 

Those are just a few our favorites, but we're always open to trying new colors! Do you have any that you swear by? Share with us on social media! 

3 Steps to Getting Started with Annie Sloan Chalk Paint®

Here at C&P, we are constantly updating our vintage furniture finds with Chalk Paint®.  There's no better or easier way to create that fabulous layered & aged look or to just brighten up a piece with a fresh new color.  If you have an old piece of furniture (or decor!) that you can't or don't want to part with, but it's no longer working with your decor, we recommend giving Chalk Paint® a try! 

We know that painting a piece of furniture for the first time can be intimidating, so here are a few steps to help you get started. 

Step 1: Clean & prep your piece. 

Wipe the entire piece with a damp cloth and then a dry cloth to remove all of the dust, etc. This will ensure that the paint will go on smoothly. In most cases, you are now ready to start painting! No sanding or priming required! 

You could encounter dings and scratches that you wish to fill in. If this is the case, do so and then sand to smooth out the surface. Then clean that area.

If you're painting a piece and stain starts to bleed through and turn the painted areas pink, coat the piece with a thin layer of clear shellac, let dry, and paint again.

You'll also want to coat the piece with a thin layer of clear shellac if you're working with new, untreated wood. According to the Annie Sloan website, this will prevent bleeding from the tannins in the knots and open grains. 

Step 2: Begin painting!

Brush the paint on the entire surface of the piece for your first coat. If you're planning to distress later, one fairly thick coat should work. Sometimes you need two coats, depending on the piece and how much coverage you prefer. 

You can use any brush, but we really prefer using the Annie Sloan brushes when applying  Chalk Paint®; they distribute paint evenly and do a great job getting into nooks and crannies. 

If you're planning to wet-distress your piece, you'll want to do that in between steps 2 & 3. (We'll post a wet-distressing tutorial later.)

Step 3: Apply clear wax.

Finally, you'll want to finish your piece with the Annie Sloan Soft Wax. First apply the wax by "pushing" it into the the paint with a lint-free cotton cloth or brush and wiping off the excess with a separate clean cloth (We prefer white t-shirt rags. You can make your own or buy them at stores like Lowes or Home Depot). Then, just buff in the wax with the direction of your paint strokes until the area is smooth and has a bit of sheen. We recommend working in sections, as this does require quite a bit of elbow grease to get the surface as smooth as possible. The piece will be dry to the touch. You can use the piece, but will need to be careful as the wax will take 5-21 days to cure. 

And that's it! We hope this helps you get started with all of those painting projects you've wanted to tackle. Stay tuned for tutorials on dark wax, wet distressing, and more!  And of course, if you have any questions, feel free to contact us